| << back to sysax.com Product page |
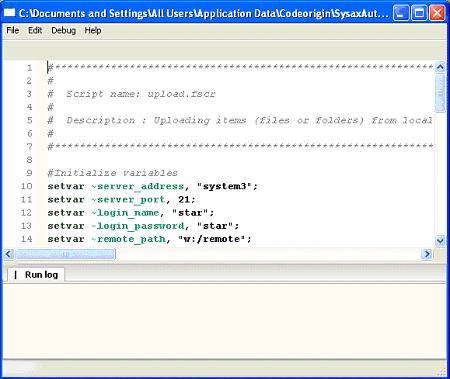
The script is automatically generated by using Script Wizard for uploading a file or folder.
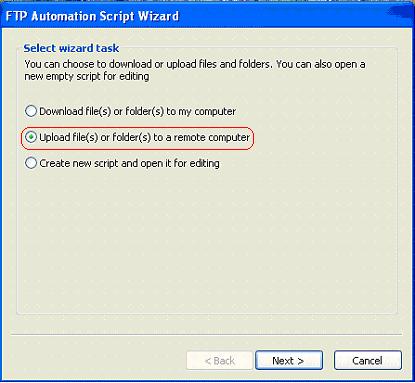
- FTP Automation Script Wizard dialog is displayed.
- Select Upload file(s) or folders(s) to a remote computer.
- Click Next button.
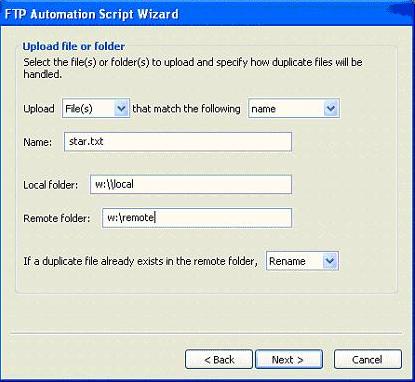
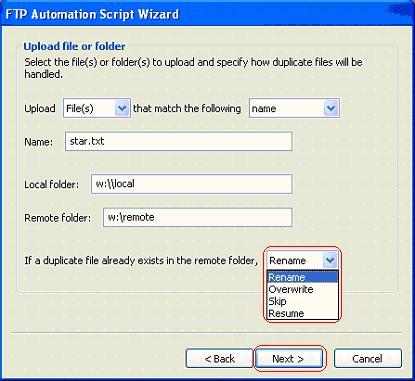
- In FTP Automation Script Wizard dialog, Upload file or folder window is displayed.
- In this window, user must set all parameters.
- Click Next button.
In the FTP Automation Script Wizard, select an item type.
Upload item types:
1. File(s)
2. Folder(s)
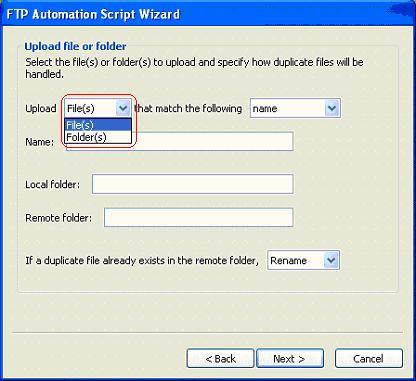
In the FTP Automation Script Wizard, select matching formats.
File or folder matching formats:
1. Name - The name of the file or folder is given by the user.
2. Wildcard name - The name of the file or folder must match a specific wildcard pattern.
3. Regex name - The name of the file or folder must match a specific regex pattern.

3. Enter the name of the file or folder.
4. Enter the remote path and local path.
Rules to handle duplicate files:
1. Rename - If the file is already exist in remote path, this option rename the file with extension .0503.
2. Overwrite - Overwrite a file that is already present in the remote path.
3. Skip - Skip the file.
4. Resume - Resume the file.
Then click Next button.
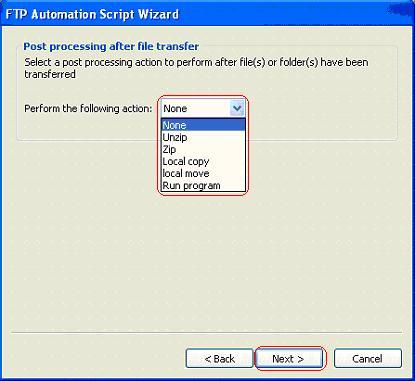
Actions performed after file is uploaded
1. None - No actions performed.
2. Unzip - Uncompress the zip file.
3. Zip - Compressing the file.
4. Local copy - Copy the file.
5. Local move - Move the file to the particular location.
6. Run program - Execute the file. Click Next button.
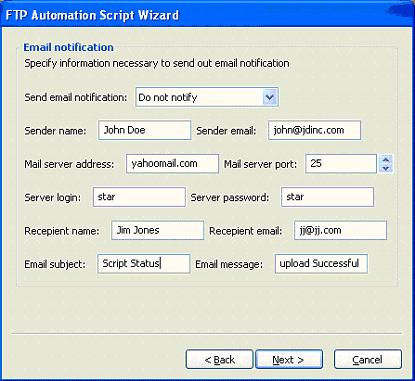
Email Notification:
1. Do not notify - No mail notification needed.
2. Notify on error - Send a mail notification on error.
3. Notify on success - Send a mail notification on success.
4. Notify on error or success - Send a mail notification always.
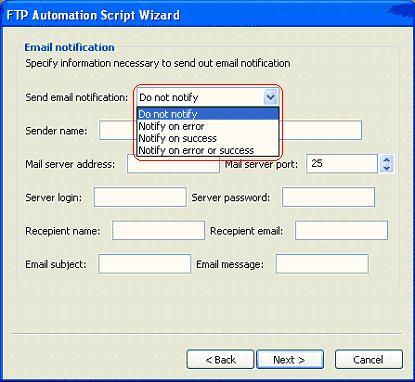
Enter the following email notifications:
Sender name, Sender email address, Mail server address, Mail server port, Server login, Server password, Recepient name, Recepient email, Email subject and Email message
Then click Next button.
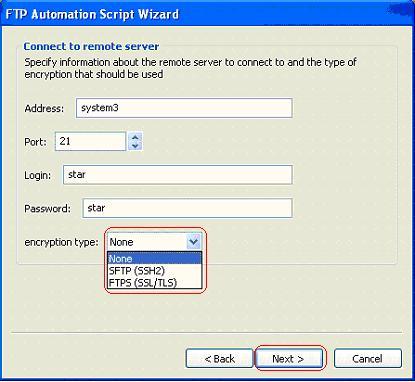
Connect to remote server:
Enter Server address, Port number, Login and Password.
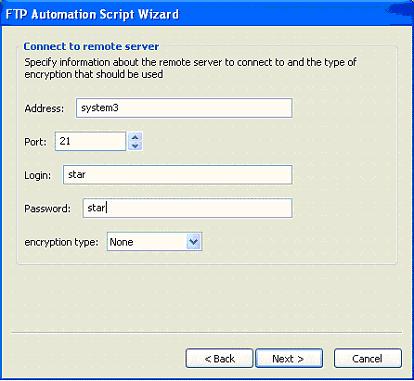
Encryption type:
1. None - No encryption is needed.
2. SFTP(SSH2) - Use SSH encryption.
3. (SSL/TLS) - Use SSL encryption type.
Then click Next button.
Enter the script name and script path using Browse button.
Then click Next button.
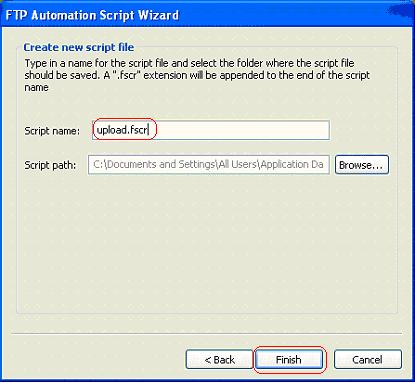
Now the script is generated for uploading a file or folder using script wizard.